I-2 Getting simBio
Getting source code via CVS
simBio's development is making progress on the "SourceForge" internet site, so connect to the SourceForge CVS from Eclipse, and get the source code.
- Select [Window]->[Open Perspective]->[Other...] from the Eclipse menu.
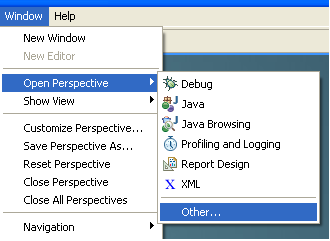
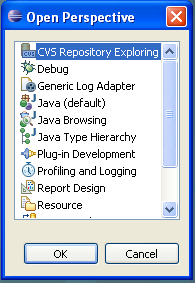
- Select [CVS Repository Exploring] in the perspective selection dialog, and click on [OK].
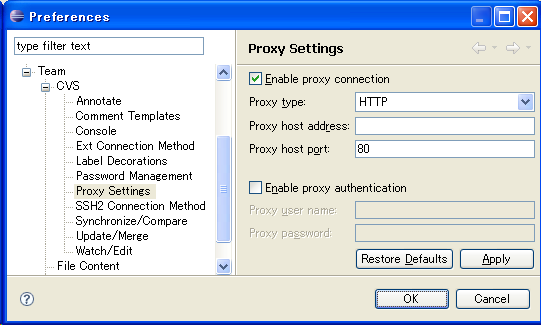
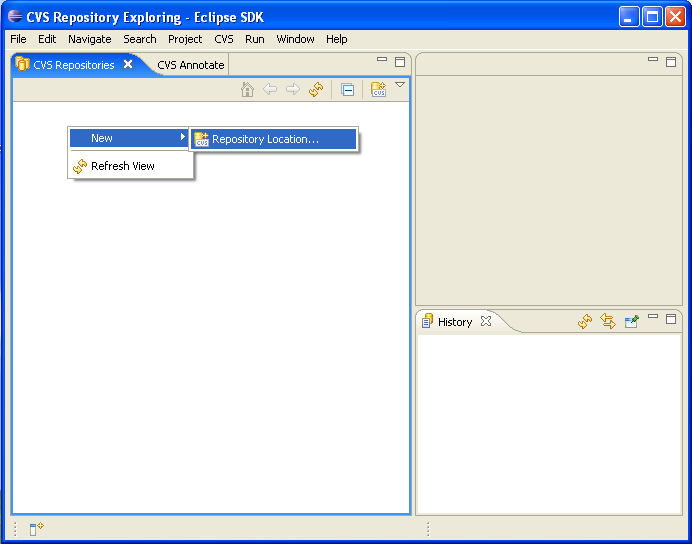
- Right click on the empty area in the CVS repository view, and click on [New]->[Repository Location...].
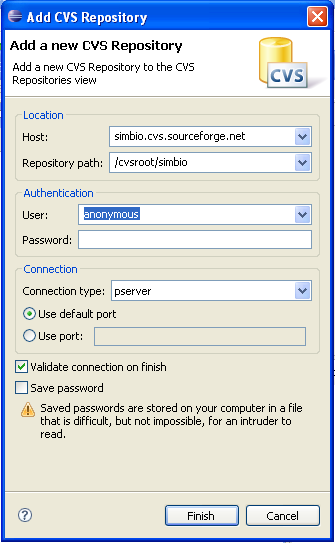
- Enter
simbio.cvs.sourceforge.net in the [Host] field,
/cvsroot/simbio in [Repository path], and
anonymous in [User], select
pserver as the connection type and click on [Finish].
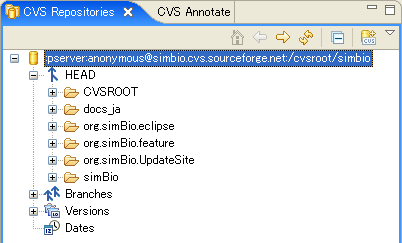
- If you can connect successfully, the CVS repository view location appears, and when you open [HEAD] you can see all
the main project folders for simBio.
 Locationmeans the place where the change history is saved. Where the configured server address, folders, user names, and connection method are all gathered is called the location.
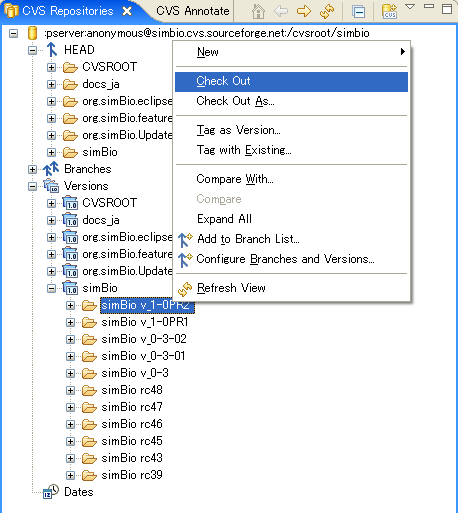
 - Open [Versions]->[simBio], select [simBio v_*], were * is the latest released version and right click.
HEAD and versionHEAD is where new features are added and mistakes are corrected with the most recent source code, and is always renewed. A version number is added when features are stable and it is released as a package.
- When you click on [Check Out] from the popup menu, code downloading begins.
Settings for using source packages
If you cannot connect to CVS from Eclipse, then use the simBio source release package.
The simBio source release package includes
- docs_ja
- JavaSpaces
- JavaSpacesClient
- RemoteClient
- simBio
Where docs_ja is a project for documents in Japanese, simBio is the project for simBio itself and the other listed project folders are used for distributed computation, see JavaSpaces for more information.
Here we only describe how to create a new Eclipse project from existing source of the simBio project, however the process for the other four projects are the same.
- Access SourceForge simBio project from the web browser and download the file simBio-*.src.zip.
- Extract the simBio project folder from the file to the Eclipse workspace folder.
Below is an example of the simBio project that has been extracted.
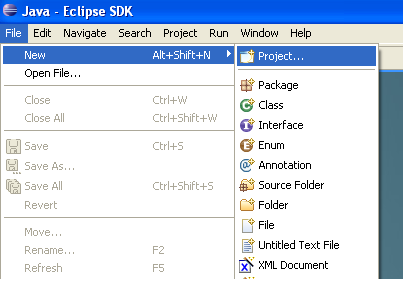
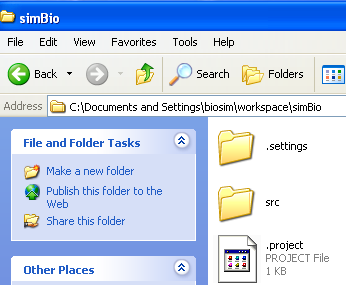 Extracted folderWhen the simBio project, which Eclipse extracted is not recognised, please check the folder. With the initial settings, the Eclipse workspace folder is C:\Documents and Settings\username\workspace. Please extract it so that the path is C:\Documents and Settings\username\workspace\simBio\.project.
 - Select [File]->[New]->[Project...] from the menu.
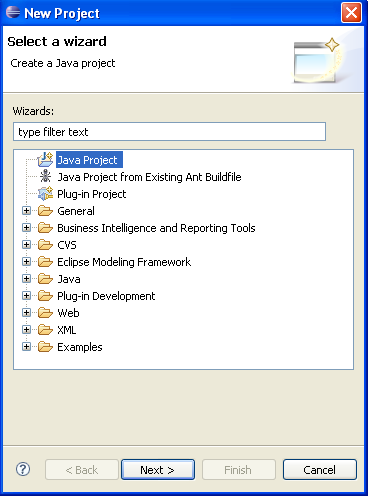
- Select [Java Project] with the new project dialog, and click on [Next].
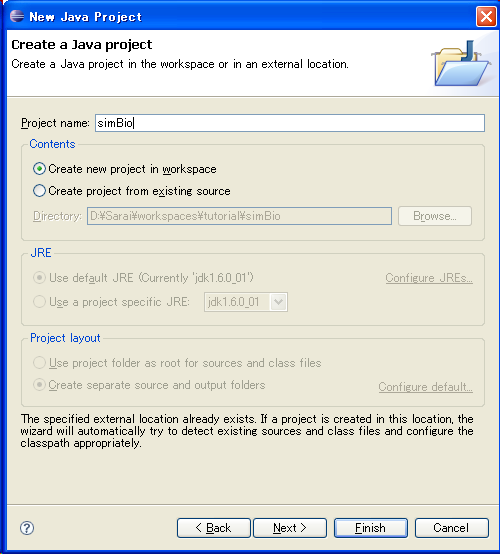
- Enter
simBio in the [Project name] box, the same as the name of the extracted folder, and when you select
[Finish] a project will be registered.
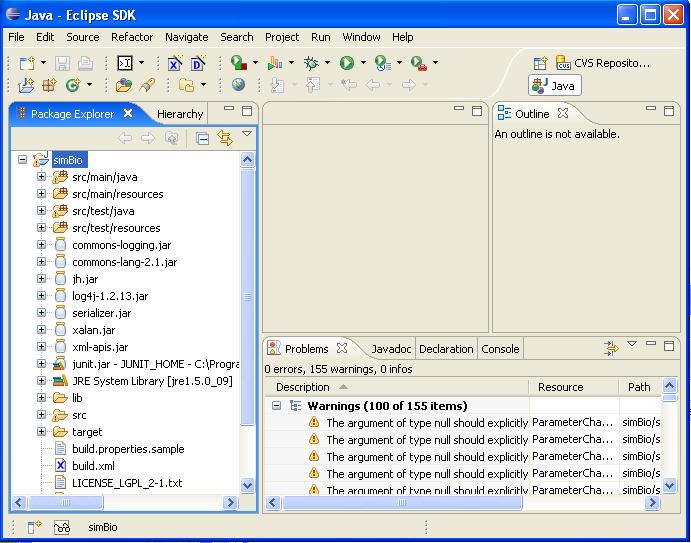
Checking simBio with the Java perspective
When the uptake has finished, select [Window]->[Open Perspective]->[Other...], select [Java] in the dialog and click on [OK].
When the "Welcome to Eclipse 3.2" screen appears, click on the arrow in the top right facing the back, and jump to [Workbench].
The simBio project is displayed in the Package Explorer view. Here simBio has been set as a project in Eclipse.
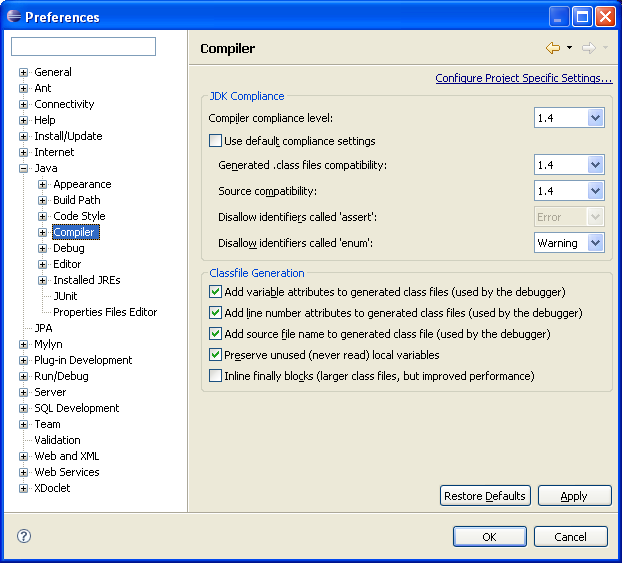
JDK Compliance Settings
The Eclipse JDK Compliance Settings need to be changed from it's default settings and set as the figure below show, if JDK 1.4 is used. In Eclipse choose the menu [Window] in Eclipse and [Preferences...] and in the preference menu choose [Java] -> [Compiler]. The settings may have a different place depending on Eclipse version. This is how JDK Compliance Settings are found in Eclipse Europa (3.3).